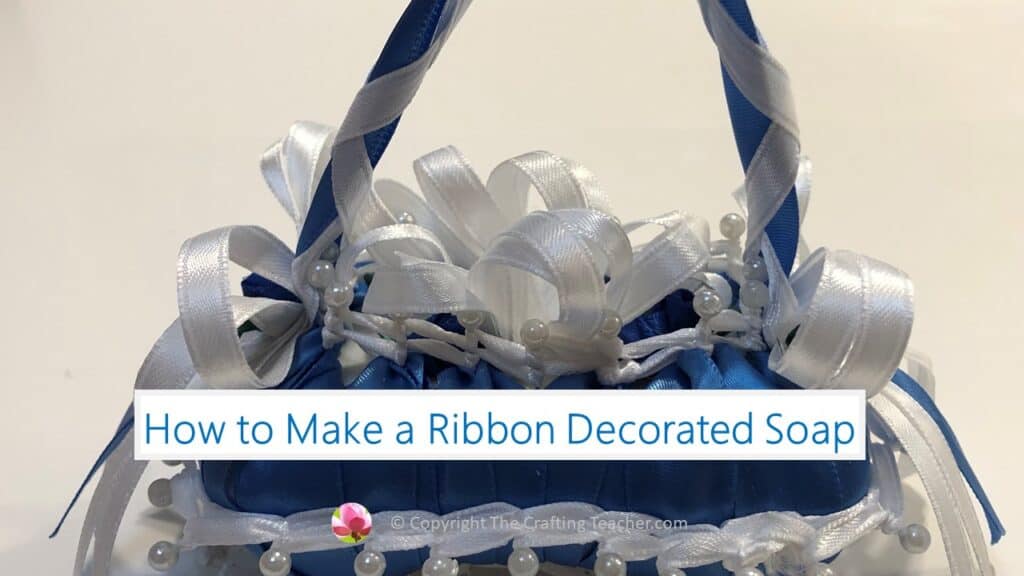
How to Make a Ribbon Decorated Soap
A Sweet Décor for Your Bathroom
Affiliate Disclosure: “This post contains affiliate links, which means I receive a small commission, at no extra cost to you, if you make a purchase using those links.”
One of the things that always comes to mind when we think about the bathroom is soap, right? Over the years, I have found out that one of the most appreciated gifts I can give somebody is a ribbon-decorated soap in the colors of that person’s bathroom.
One year, I asked my teachers which colors their bathrooms were, and I custom-decorated soap for each of them as a gift during Teachers Appreciation Week. It was a ginormous success, and they still have their soaps.
The process is very simple, and today, I want to share it with you for the first time. I suppose there are probably millions of people who know how to make these soaps, but I have always enjoyed thinking that it is my special secret. I know, I know, silly, right?
Anyways, here comes nothing. I hope you enjoy the process and start making your own.
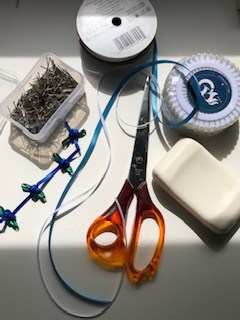
Supplies Needed to Make a Ribbon Decorated Soap
- white soap
- white Satin Ribbon
- 3/8″ Blue Satin Ribbon
- Stainless Steel Straight Quilting pins
- Pearl Head Pins
- scissors
- Bows Silk Roses (optional)
You can use many other types of materials and colors to create variety and ensure your soap matches the decor in your bathroom. It’s just a matter of trying any combination you might like.
I normally only use 1/4-inch ribbons, but in this case, I had to use a wider ribbon for the soap’s body because this particular soap had a curve, and I needed a wider ribbon to cover the corners appropriately. Try to buy a perfectly rectangular soap, because curved soaps like the ones I used in this project are more difficult to wrap. A perfectly rectangular soap will not only make your job easier, but the result will be more pretty as well.
Instructions
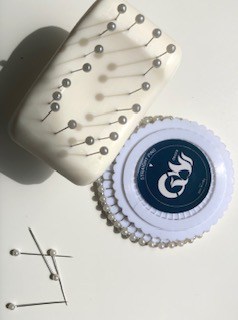
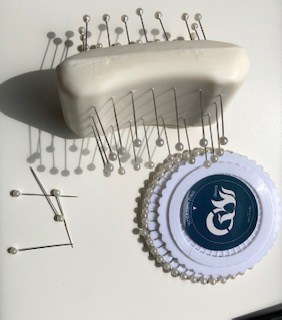
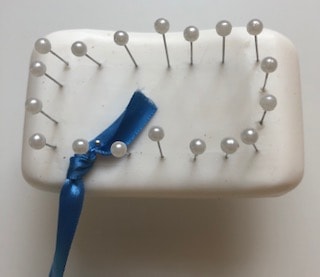
Uncover your soap from the packet and observe which side has its brand. This is the part you will use for the bottom.

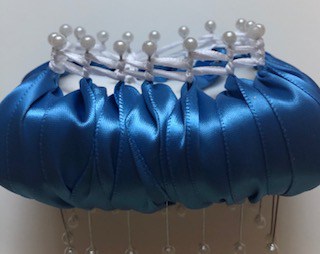
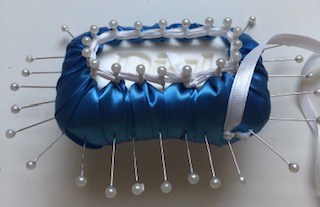
Take your Pearl Head Pins and start placing them at the top and bottom of your soap, trying to have the same distance among them and always using equal amounts of pins for both sides of the soap.


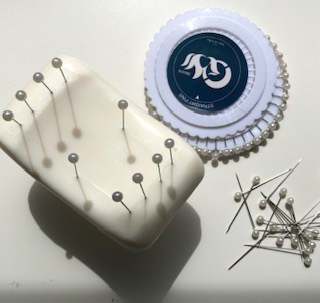
This step is crucial when you start wrapping your ribbon around the soap.
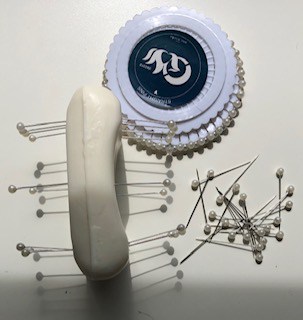
Once you finish placing the pins, take your chosen ribbon and make a knot around one of the bottom pins. (Remember to choose the side with the soap brand as your bottom.)
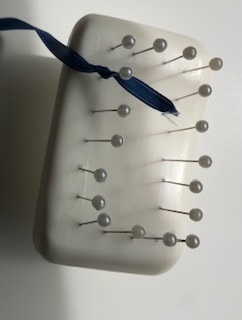
Secure the end of the ribbon with a stainless steel pin, close to the pearl headpin. It’s better to try to hide those types of pins as much as possible. The result will look prettier and better done.
Start wrapping the ribbon around the soap, from the bottom to the upper pin, following the lines of pins until you cover the entire soap. Be careful not to jump any pin, because it will show and won’t look good at the end.

You will probably need to wrap your ribbon twice around the soap’s corners to ensure that it covers them well. You don’t want any part of the soap to show.
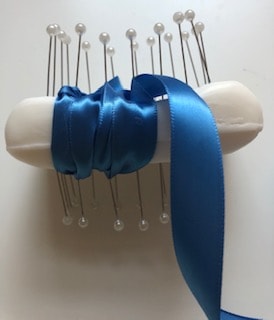
Once you cover the entire soap, make sure you tie the end of your ribbon to the bottom of the soap with a knot and a pin, which is exactly how you tied it at the beginning.
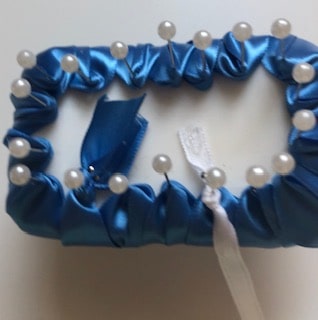
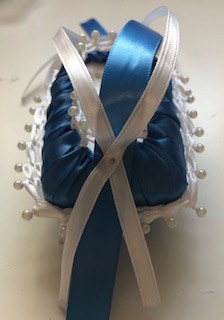
Next, tie your second ribbon with a knot to one of the pins and secure it with another pin, as shown in the picture.
This time, wrap your second ribbon around the pins on the same side. Once you finish that side, do the same with the other side.
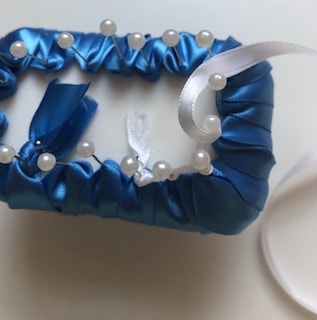
Don’t forget to secure the end of the ribbon with a knot and a regular pin.
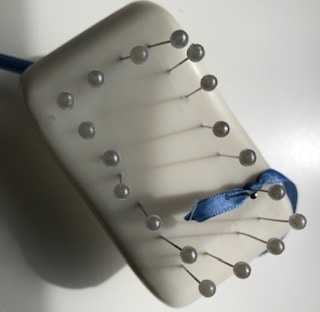
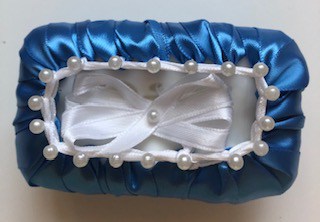
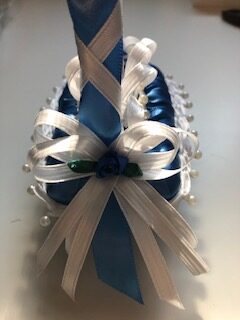
Once you finish wrapping your second ribbon around both sides, make a little bow with the same ribbon and pin it to the bottom of your soap to cover the knots and pins you used before. Do the same on the top of your soap, only this time make the bow a little bigger. You can also add mini silk flowers if you want.
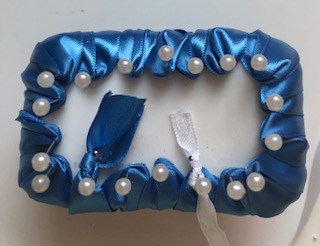
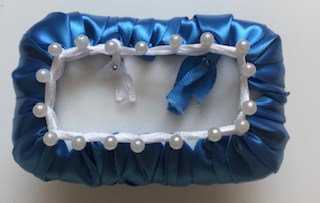
Following this step, pearl head pins are placed around the middle of the soap, trying to place those pins at the same distance from each other.
I use the trick to place the pins on the four corners first. Then, place a pin in the center of each side of the soap. That helps me calculate how many pins I need between the corner and the center pin to place the same number of pins on either side.
Following this step, you have to wrap your white ribbon around those pins exactly how you did it on the top and bottom of the soap. Don’t forget to secure it with a stainless steel pin, trying to hide that pin under the wrapped ribbon.
It looks charming to make a little handle to give your soap the look of a little basket.
To make your handle, you have three options:
- Pin one or more pieces of ribbon from one end to the other, leaving enough length to look like a little handle or
- Pin 3 pieces of ribbons on one side, make a braid with them, and pin them on the other side, or
- Pin three pieces of ribbons, crisscross two pieces around the third one, and pin them to the other end of the soap.
Options 2 and 3 make the handle stronger and are my personal favorites.
Finish each end with a pretty bow. You can add a little silk flower if you want, as I did.
Finally, display your pretty soap any way you want in your bathroom.
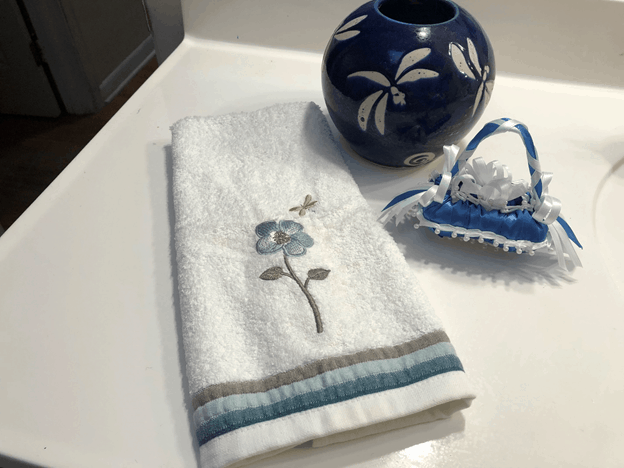
Place it in a pretty box with tissue paper if you want to use it as a gift.
You can use only one color of ribbon if you want, but this choice will blend all the sides, and you won’t be able to make the two different types of wrapping stand out.
The sky is the limit as far as the combination of colors, and I promise your soap will last for years on end as long as you don’t let it get wet.
You have to use a soft brush to clean the dust that the ribbon might accumulate.
Conclusion
I have found it satisfying to make things with my hands and either display them in my home or give them away as gifts. This particular craft has been one of my favorites for many years and has always been a huge success every time I give it to somebody because it is different, and people tend to appreciate it when you take the time to make something for them.
I hope this post inspires you to make a pretty ribbon-decorated soap for your bathroom or many for your friends. Let me know if you have any questions or doubts that I can help you with. Remember that my door is always open.
Good luck, and enjoy this new adventure.
Be happy, safe, and creative. I wish you well.
Love,

Also, if you want to see an article about making something specific, please let me know, and I will try my best to write it for you. My goal is to help you in any way I can, and I’m not too fond of anything better than posting something that you might find helpful.