How to Make a Mason Jar Chandelier
Affiliate Disclosure: “This post contains affiliate links, which means I receive a small commission, at no extra cost to you, if you make a purchase using those links.”
One of the things that I like to do is recycle items that otherwise will go in the trash, because not only save you money, but sometimes those items become something entirely different that can be beautiful and useful.
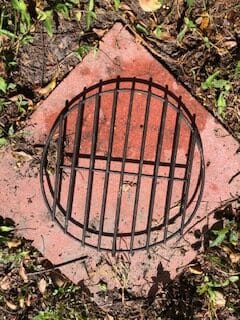
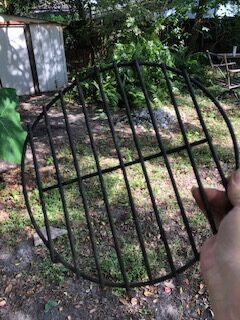
A few months ago a decided to clean up my backyard which has become a little neglected for lack of time, and when I was pulling out some ferns that took over a corner I stumbled upon the rack that was part of my old fire pit.
My first thought was to throw it in the trash, but then I remember I had a pretty tree next to my corner patio that was the perfect spot for a candle chandelier. That was the beginning of my inspiration, and I wanted to share with you what I did, so you can do it too.
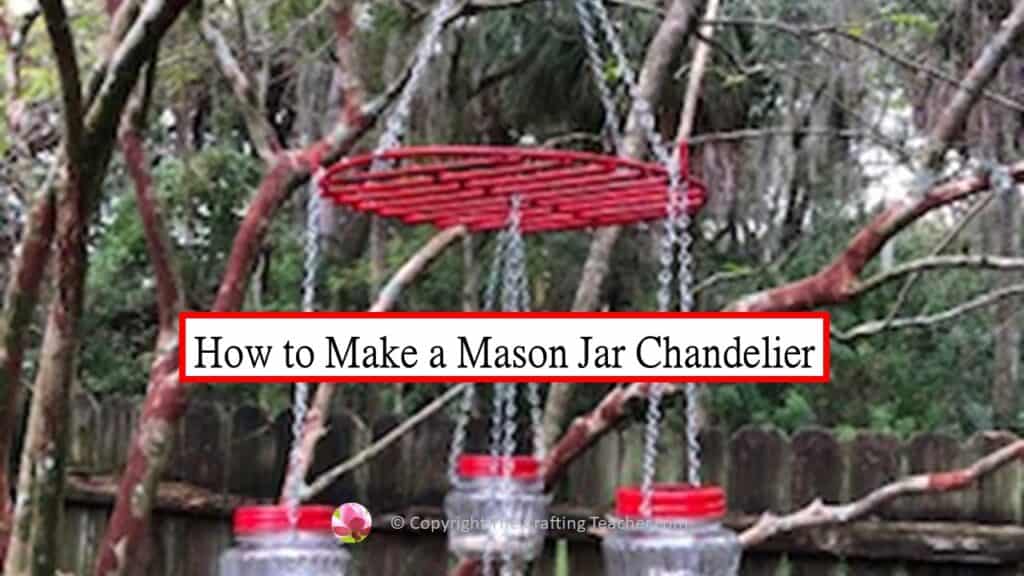
Mason Jars Chandelier
The name is this chandelier I made came from the mason jars I used to make it. My idea was to use candles, not just for ambiance but also to use mosquito repellent candles in it, since that is a big problem we have here in Florida, especially in an area like where my house is situated, has water and preservation are behind my backyard, that brings a lot of creatures like mosquitos.
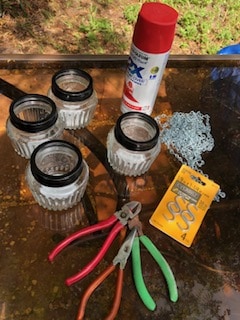
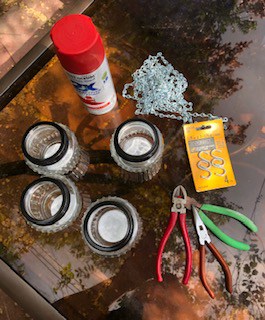
The materials I used were just a few and were super cheap.
Materials needed
- An old rack or other base.
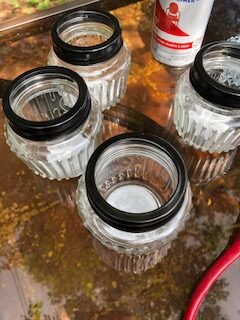
- Four mason jars.
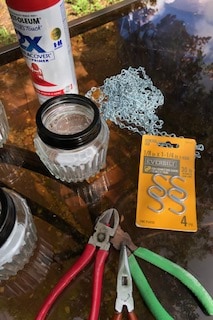
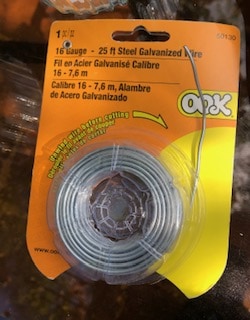
- Galvanized wire.
- Thin chain.
- S-shaped hooks.
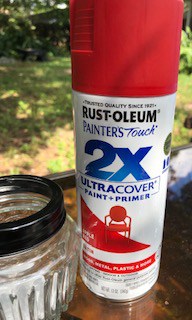
- Rust-oleum spray paint.
- Wire cutter.
- Pliers.
- White sand.
- Citronella-scented tea candles.
Instructions
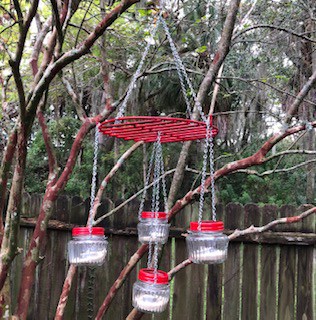
The first thing to do is take the base you are going to use and clean it well. As you can see in the picture, the rack I found was in pretty good condition, but super dirty. It was really surprising to find out that it was not completely rusted, since it was hidden among the ferns for a good couple of years at least.
Once it was really clean, I decided I didn’t want it black. I have touches of red here and there in my house since it is my favorite color; therefore I decided to paint it red using Rust-oleum. I love that paint because it comes in a spray and it is designed for any surface you can imagine. Easy to use and inexpensive.
The mason jars I found were open on the top, which was great to make it easier to change the candles, but they had a black lid, so I decided to paint the lids red as well.
Since I wanted to hang it from the tree I mentioned, I needed to find a way to connect these mason jars with the rack and hang the chandelier from the tree. To do this I decided to use the smaller chain I could find.
I tried to find a red one but my only choices were black, silver and gold. I used the silver one because the bark on my tree has a silver underline and I thought it was the best choice since I didn’t want the chain to stand out that much.
The s-shaped hooks came in handy to be able to connect the jars to the rack and the rack to the tree, and it makes it easier for me to take the jars down when I need to clean them or change the candles.
To connect the jars with the rack I measured 4 pieces of chain using the same length, to make the chandelier stable on not tilting to one side. I was thinking about how to connect the jars with the chain, and that’s where the wire was handy. I measured a piece of it around the jars, cut 4 pieces of the same length using a wire cutter, and used the plyers to tie a piece around each jar with a loop after I passed it through a piece of chain.
Then I used the s-shaped hooks to connect each mason jar’s chain to the rack, and a larger chain to hang the rack from the tree.
Finally, I put Dollar Tree sand in each mason jar and a citronella tea candle I bought at Amazon. That’s it. I look super cool at night and not so bad in the daylight. The jars get full of water when it rains, but since I used the S-shaped hooks they are very easy to clean and reused. This is the result.
Conclusion
Since I was very young, I discovered how satisfying it is to make things with my own hands and either displays them in my home or give them away as gifts. This particular craft came unplanned and it was a nice surprise how useful and interesting has become.
Somebody’s trash could indeed be some else treasure. I don’t collect old broken stuff. I don’t like to accumulate things that I’m not going to use, but once in a while I come up with these ideas when I’m about to get rid of something, and I tried to put them in place right away to avoid clutter.
I hope this post inspires you to make something yourself, and if you like something (anything) that you would like to reuse and don’t know how, please let me know and together we might come up with an idea that might suit you. Remember that my door is always open.
Good luck, and enjoy this new adventure.
Be happy, safe, and creative. I wish you well.
Love,

P.S. If you would like to see an article about how to make something specific, please let me know and I will try my best to write it for you. My goal is to help you in any way I can and I don’t like anything better than to post something that you might find useful.